

Running Ethernet Cable in a Finished House Without Wrecking It
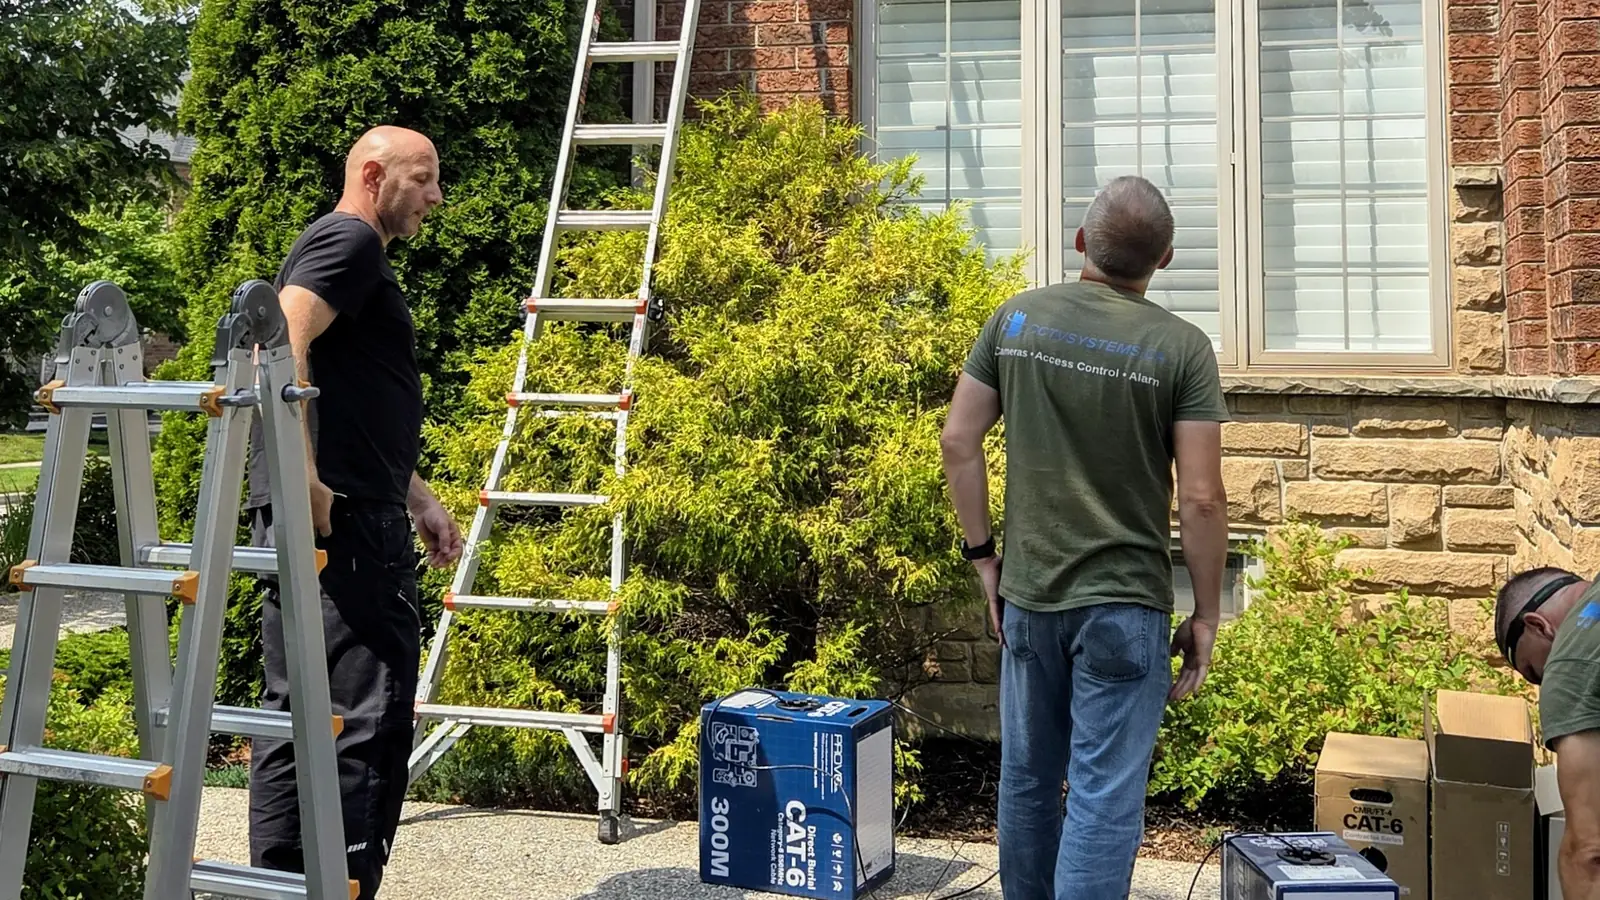
Nine cable runs, four cameras, three access points, two hardwired computer drops — through a fully finished Oakville home. No cable visible anywhere, and not one hole cut that wasn't covered by a device when we left.
SetupTeam serves Oakville, Toronto, North York, Vaughan, Richmond Hill, Markham, Mississauga, Aurora, Newmarket, Etobicoke, Burlington, and the wider GTA. Ubiquiti UniFi installer · 10,000+ completed projects · 530+ Google reviews · $2M liability insurance.
Almost every homeowner who asks us about running Ethernet in a finished house opens with the same sentence: "I assume you'd have to tear the walls apart." You don't. A retrofit is not a demolition problem, it's a routing problem — and the houses in this part of the GTA are unusually good candidates for it, because they were built with accessible attics, open basement ceilings, and soffits deep enough to hide a cable. This is what a full retrofit actually looks like, using a job we finished in Oakville on July 28th as the example. If you want the service page rather than the walkthrough, that's network installation in Oakville.
Can You Run Ethernet in a Finished House Without Cutting Drywall?
Yes — the goal isn't zero holes, it's zero unnecessary holes
This distinction matters, because "no holes" is a promise nobody can keep and homeowners rightly don't believe it. Every network drop needs one opening: the spot where the keystone wall plate sits, where the access point mounts, or where the camera base lands. That opening is created once, and when the job is finished the device covers it completely. Nobody looking at the wall afterwards can tell it exists.
What a careful installer avoids is the other kind of hole — the exploratory ones. The 4-inch square cut halfway up a hallway wall because someone guessed wrong about where a fire block was. The patch above a door because a fish tape got stuck. Those are the holes that turn a one-day job into a one-day job plus a drywaller plus a painter, and they come from starting the pull before the route is understood.
On the Oakville house, nine runs were completed and every single opening we made ended up underneath a device. No drywall repair, no paint, no filler. That is the standard the work should be measured against, and it is entirely achievable in a house with an accessible attic.
The Route Decides the Job — Basement to Attic, Then Back Down
One vertical path up, then horizontal distribution from above
The single most useful thing you can do in a finished house is establish one clean vertical path between the basement and the attic, and then treat the attic as the distribution floor for everything above the ground level. On this job the equipment location was a designated area in the basement. From there the cable bundle went up through an interior chase to the attic in one pull, and from the attic it fanned out to each destination.
That structure is why it works. If you try to route each drop independently from the basement to its endpoint, you fight the house nine separate times. If you get to the attic once, eight of the nine runs become straightforward: drill down through the top plate into the wall cavity, drop a weighted line, catch it at the opening you already cut for the plate. The cavity does the rest of the work.
The routes worth scouting before you touch anything are the usual suspects: existing plumbing stacks, HVAC chases, the space behind a laundry or mechanical wall, the corner of a closet where the floor above lines up with the floor below, and cold-air returns. In a house like this one, the interior chase was the clean answer. In a bungalow with a finished basement ceiling and no attic, the answer is completely different, which is why this gets walked before it gets quoted.

Exterior runs follow the same logic in reverse. Rather than punching through a wall at each camera position, the cable exits into the soffit and travels laterally behind it. The soffit is a continuous, ventilated, protected channel that already wraps the entire building, and almost nobody uses it. It is the reason the finished exterior on this house has four cameras and no visible wire.
Why We Use Outdoor-Rated Cable Where Most Installers Don't
The jacket is what fails first, and it fails two years after the invoice
This is the part of the job that separates work that lasts from work that photographs well. Standard indoor Cat5e and Cat6 has a PVC jacket that is not UV-stable and is not rated for wet locations. Run it through a soffit, past an attic vent, or out to an exterior camera, and it will do exactly what PVC does in an Ontario climate: chalk, stiffen, and crack. Once the jacket splits, water wicks along the cable, the conductors corrode, and the link degrades — usually intermittently first, which is far more annoying than an outright failure.
The failure is slow enough that the person who installed it is long gone by the time the camera starts dropping offline at 3am. That is precisely why it happens so often. Nobody gets a complaint about it on day one.
On this house every run that touched the outside is outdoor-rated. The four camera drops are outdoor-rated Cat5e. The three access-point runs and the second-floor in-wall drops are outdoor-rated, FT4-certified Cat6. The cost difference across nine runs is real but modest — a fraction of the labour cost of the day. The cost of pulling those runs a second time, through a house that is finished, is not modest at all.
There is a second, quieter reason to spec up: an outdoor-rated jacket is physically tougher during the pull itself. Cable dragged through a soffit, over a fascia edge, and past insulation baffles takes abrasion that a thin indoor jacket does not always survive intact — and a nicked jacket inside a finished wall is a problem you find later, not now.
What FT4 Actually Means on a Canadian Job
A fire rating, not a performance rating — and they are independent
FT4 is a CSA flame-test rating. It means the cable passed a vertical flame test for grouped cables, and it is the general-purpose rating accepted for in-wall and riser runs in most Ontario buildings. If you are used to American terminology, it is broadly the counterpart of a CMR marking.
The thing worth understanding is that FT4 has nothing to do with speed. A cable's category — Cat5e, Cat6, Cat6A — describes its electrical performance. Its FT rating describes how it behaves in a fire. They are printed on the same jacket and they are completely separate specifications. A Cat6 cable with no FT rating is not a substitute for an FT4 Cat5e cable inside a wall, and vice versa.
Where a ceiling cavity is used to move return air, the requirement steps up to FT6 (plenum), which passes a horizontal flame-and-smoke test and produces less smoke. That is far more common in commercial buildings than in houses, but it is not unheard of in larger residential mechanical designs, and the authority having jurisdiction makes the final call rather than the installer. We wrote a longer breakdown of that distinction in FT4 vs FT6 cable for Ontario offices if you want the full rundown of which rating applies where.
Not sure whether your house can be wired without opening walls?
The answer is almost always decided by attic access, basement ceiling, and where your equipment can live. We walk the routes first and tell you what's realistic before quoting anything.
Cat5e or Cat6 for PoE Security Cameras?
Cat5e is genuinely fine for cameras — spend the upgrade where it does something
There is a persistent belief that every run should be Cat6 or you have cheaped out. On a camera drop, that isn't true. A residential PoE camera — a UniFi Protect G6 Turret, for example — streams well under a gigabit and draws modest PoE power. Cat5e carries that comfortably at any distance you'll encounter in a house.
Cat6 earns its place on runs that will carry more than a camera: access points that aggregate a whole floor's wireless traffic, hardwired computer drops, and anything that might later become an uplink between switches. That is exactly how it was allocated on this job.
How the nine runs were specified
| Run | Count | Cable specified | Why |
|---|---|---|---|
| Exterior PoE cameras | 4 | Outdoor-rated Cat5e | Camera bandwidth and PoE draw sit well inside Cat5e. The jacket rating, not the category, is what matters on an exterior run. |
| Ceiling access points | 3 | Outdoor-rated FT4 Cat6 | Each AP aggregates a floor's wireless traffic. Headroom here is worth paying for, and FT4 covers the in-wall and attic portions. |
| Hardwired computer drops | 2 | Outdoor-rated FT4 Cat6 | Desk drops are the runs most likely to be asked to do more later. Full-gigabit headroom, terminated to keystone plates. |
The one place we do deviate upward from the general rule: if a camera position is unusually far from the equipment location, or is likely to be replaced later with a higher-resolution or PTZ model that draws more power, Cat6 goes in instead. Re-pulling a single long exterior run costs more than the cable did.
Mounting Cameras Under the Soffit With No Visible Wire
The cable enters through the mounting hole, and the base covers it
A soffit-mounted camera is the cleanest exterior install available on most houses, and it solves two problems at once. The camera sits under the eave, which shelters the lens from rain and direct sun and keeps spiders and snow off the glass. And the soffit panel is a hollow, ventilated cavity that the cable can travel through laterally, so the wire never has to cross a visible surface.

The sequence is straightforward once the cable is already in the soffit: mark the position for the coverage you actually want, cut the mounting hole, pull the cable through it, terminate, seal the penetration, and mount the base over top. The cable disappears entirely. What you should not see on a finished install is a length of cable stapled along the underside of the soffit or down the fascia to a camera — that is the shortcut, and it's visible from the street forever.

Placement is its own discipline and it's worth more than camera resolution. Four cameras positioned to cover approach paths, the driveway, and the entry points will produce more usable footage than eight cameras aimed at open lawn. We covered what that footage actually looks like in when UniFi Protect is the right choice. If you want the service page for this specific work, it's security camera installation in Oakville.
Why Three Wired Access Points Beat a Mesh Kit in a House This Size
A cable removes the compromise that mesh is built around
A mesh node without a cable has to use its radios for two jobs at once: talking to your devices, and talking back to the other nodes. Every hop away from the router costs throughput, and the cost compounds. It's a genuinely clever solution to the problem of not having cable — but if you're already running cable, the compromise is unnecessary.
A wired access point has a dedicated uplink, so its entire radio capacity goes to client devices. Add a second and a third and performance scales instead of degrading. In a three-storey house the difference shows up exactly where you'd expect: the far bedroom, the basement, the backyard. Three wired access points, positioned by floor and staggered rather than stacked directly above one another, covered this house properly.
The mistake we see most often on retrofits is placing access points where the cable was easy rather than where the coverage is needed — usually all three in the same vertical column near the mechanical room, which produces a strong signal in one corner of the house and nothing at the perimeter. That's a route-planning decision made on day one, not a configuration problem you can fix later. There's a longer version of this argument in why larger custom homes need wired access points.
Nine retrofit runs through a fully finished two-storey home
The house is a finished two-storey brick home in Oakville with an accessible attic and a designated equipment area in the basement. Nothing had been pre-wired. The homeowner wanted exterior camera coverage, proper wireless throughout the house rather than a router in a corner, and two hardwired drops for desktop computers — and reasonably enough, did not want the house torn up to get it.
What we ran
Nine runs total. Four outdoor-rated Cat5e drops to UniFi Protect cameras in Oakville positioned around the property, three outdoor-rated FT4 Cat6 runs to ceiling-mounted access points, and two outdoor-rated FT4 Cat6 drops terminated to keystone plates for hardwired computers. The second-floor in-wall drops were run in the same FT4-certified Cat6.
How it was routed
One vertical path from the basement equipment area up to the attic, carrying the full bundle. From the attic, everything distributed outward: down through top plates into second-floor wall cavities for the in-wall drops, out to ceiling positions for the access points, and out into the soffit for the exterior camera runs, travelling laterally behind the soffit to each camera position.
What the finished job looks like
Zero cable visible, inside or out. Every opening made during the day is covered by a wall plate, an access point, or a camera base. No drywall repair was required, and no painter had to follow us. The cameras came online on the local recording appliance, coverage was verified from the app before the ladders came down, and the wireless was tested at the far corners of the property rather than beside the equipment.

Oakville Retrofit Cabling — Job Summary
- Property: Fully finished two-storey brick home, Oakville — no existing low-voltage infrastructure
- Scope: 4 exterior UniFi Protect cameras, 3 wired access points, 2 hardwired computer drops — 9 runs total
- Cable specified: Outdoor-rated Cat5e to the cameras; outdoor-rated, FT4-certified Cat6 to the access points and the second-floor in-wall drops
- Routing: Single vertical path from the basement equipment area to the attic, then distributed from the attic to wall cavities, ceiling positions, and laterally through the soffit to each camera
- Result: No cable visible inside or outside the home, every opening covered by a device, no drywall repair or repainting required
How Long It Takes, and What It Costs
The labour is in the routing — the pull itself is minutes
A nine-run retrofit of this shape is a full day for a crew, given an accessible attic and a workable basement path. Very little of that day is cable pulling. It goes into scouting routes, ladder work, drilling and sealing exterior penetrations, feeding through insulation, terminating, and testing every run before anything gets buttoned up.
Cost follows the same logic, which is why retrofit pricing looks so different from pre-drywall pricing. On an open-wall renovation, a run can be roughly $129 because the installer is walking through a stud bay with a drill. The same drop in a finished house is a different job entirely, and the variables are attic access, ceiling heights, insulation depth, exterior material, masonry versus frame interior walls, and how many drops can share a single path. Two drops in the same house can be an hour apart in labour. That's why we quote retrofit cabling after walking the routes rather than off a per-drop rate over the phone.
If your walls are open — a renovation, an addition, a new build — this is a completely different and much cheaper conversation. That one is covered in low-voltage wiring during a renovation or new build.
When Fishing Cable Yourself Makes Sense — and When It Doesn't
One drop from an accessible attic is a weekend project. Nine isn't.
We're not going to pretend a single Ethernet run is beyond a capable homeowner. If you have a floored, accessible attic, a wall directly below a top plate you can reach, and you're feeding one drop to an office, the method is well documented: locate the wall from above, drill the top plate, drop a weighted string, cut the plate opening, catch the string, pull the cable. Buy a proper punch-down tool and a tester rather than crimping RJ45 plugs onto solid-core cable.
Where it stops being a weekend project: exterior penetrations that have to be sealed correctly against water and air, anything requiring ladder work above single-storey height, soffit runs, spray-foamed roof decks, fire blocks in older balloon-framed walls, and any run where you can't confirm what's inside the cavity before you drill. Drilling blind through a top plate into a wall carrying electrical, plumbing, or a gas line is the failure mode that matters, and it is not a hypothetical one.
The other honest reason to hand it over is scale. The cost per run drops sharply once a crew is already on site with the ladders up and the attic path established. Nine runs done together is a fundamentally different economic proposition from nine runs done one at a time.
Worth checking before you book anyone
- Can you physically get into the attic, and is there room to work at the eaves?
- Is the basement ceiling open, or is it finished drywall?
- Where will the equipment live — is there power and ventilation there?
- Is the roof deck spray-foamed? (This closes off the soffit path and changes the whole plan.)
- Are the interior walls frame or masonry?
- Ask any installer which specific cable they'll use outside, and whether it's FT4-rated where it goes in-wall. The answer tells you a lot.
If an installer quotes exterior camera runs without mentioning the jacket rating, ask. Indoor cable in a soffit is the single most common shortcut in residential low-voltage work, and it is invisible on the day it's installed.
Quick Answers
Can Ethernet be run in a finished house?
Yes — through the unfinished spaces the house still has. Basement, attic, joist bays, interior chases, and the soffit. Cable only enters a wall cavity for the last few feet, at the spot a plate or device will cover.
Do you have to cut holes in the drywall?
One per drop, exactly where the keystone plate, access point, or camera base mounts — and the device covers it. Exploratory holes that need patching and paint are the sign of a route that wasn't planned.
Can indoor Ethernet cable be used outside?
No. PVC indoor jackets aren't UV-stable or rated for wet locations. In an Ontario soffit they chalk and crack, water wicks in, and the link degrades — typically a year or two after the installer left.
What does FT4 mean?
A CSA flame rating for in-wall and riser cable, roughly equivalent to CMR in the US. It's independent of Cat5e/Cat6 performance — the two specs are printed on the same jacket but mean different things.
Cat5e or Cat6 for PoE cameras?
Cat5e is genuinely sufficient for residential PoE cameras. Put the Cat6 where it does something — access points, hardwired desk drops, and anything that may become a switch uplink later.
Frequently Asked Questions
10 questionsYes. A finished house is wired by working from the unfinished spaces it still has — the basement, the attic, the joist bays, interior chases, and the soffit — rather than by opening walls. Every cable is routed to the point where it only has to travel the last few feet inside a wall cavity, and that last stretch is reached through the same opening the wall plate or camera base will cover. In a typical two-storey GTA home with an accessible attic and an unfinished basement ceiling, most drops can be completed with no drywall repair at all.
You do not avoid holes entirely — you avoid unnecessary ones. Each drop needs one opening where the keystone plate, access point, or camera will sit, and that opening is fully covered by the device once it is installed. The cable reaches that point through the attic, the basement, a plumbing or HVAC chase, or the exterior soffit, so there is no need to cut inspection holes along the route. Drilling the top plate from the attic and dropping a weighted string into the cavity is the standard method for a second-storey wall drop.
No. Standard indoor PVC-jacketed Cat5e and Cat6 is not UV-stable and is not rated for wet locations. In Ontario weather it chalks, cracks, and lets water wick into the jacket, which corrodes the conductors and eventually kills the link — usually a year or two after the installer has gone. Any cable that leaves the building envelope, runs through a soffit, crosses an attic vent, or terminates at an exterior camera should be outdoor-rated with a UV-stable jacket. The cost difference over a nine-run job is small; the cost of re-pulling it is not.
FT4 is a CSA flame-test rating used in Canada. It means the cable passed a vertical flame test for grouped cables and is the general-purpose rating accepted for in-wall and riser runs in most Ontario buildings. It is roughly equivalent to the CMR marking used in the United States. FT4 is separate from the performance category — a cable can be Cat5e or Cat6 and carry an FT4 rating independently. Where a ceiling space is used to move return air, a plenum-rated FT6 cable is required instead, and the authority having jurisdiction makes that call.
For a typical residential PoE camera, Cat5e is entirely sufficient. Cameras like the UniFi Protect G6 series stream well under 1 Gbps and draw modest PoE power, and Cat5e handles both comfortably at normal house distances. Cat6 earns its place on runs that carry more than a camera — access points, hardwired computer drops, and anything feeding an uplink — where the extra headroom and better crosstalk performance matter. Jacket rating matters more than category on an exterior camera run: outdoor-rated Cat5e is a better cable outside than indoor Cat6.
Retrofit runs cost substantially more than pre-drywall runs because the labour is in the routing, not the cable. Open-wall rough-in on a renovation can be roughly $129 per run; the same drop in a finished house is a different scope entirely, and pricing depends on attic access, ceiling height, insulation depth, exterior material, and how many drops share a common path. SetupTeam quotes retrofit cabling after a walkthrough of the actual routes rather than by the drop, because two drops in the same house can differ by an hour of work.
A nine-run retrofit covering exterior cameras, ceiling access points, and hardwired computer drops is a full day for a crew, assuming an accessible attic and a workable basement path. The pull itself is a small fraction of that time. Most of the day goes into route planning, ladder work, drilling and sealing exterior penetrations, feeding through insulation, terminating, and testing. Homes with finished attics, spray-foam roof decks, or masonry interior walls take longer because the easy paths are gone.
An attic is usually the best distribution point in a finished house. Cable comes up once from the basement equipment location through an interior chase, and from the attic it fans out to second-floor wall drops, ceiling-mounted access points, and exterior soffit locations. Cable should rest on top of the ceiling joists or be supported clear of them rather than being buried under blown-in insulation, kept away from heat sources and pot lights, and never left draped where someone stepping into the attic will land on it.
A mesh node without a cable spends part of its radio time talking to the other nodes instead of to your devices, and each hop away from the router costs throughput. A wired access point has a dedicated uplink, so all of its radio capacity goes to client devices, and its performance does not degrade as you add more units. In a three-storey home the difference is most obvious at the edges — the far bedroom, the basement, the yard — where a wired access point holds a usable connection and a distant mesh node does not.
Not always, but you do need a designated location. Every drop has to land somewhere with power, ventilation, and room for a PoE switch and the recording device. A small wall-mounted rack or enclosure in a basement utility area is the usual answer, and deciding on it before the first cable is pulled is what keeps the runs the right length and the terminations organised. Retrofits that skip this step end up with cable coiled behind furniture and a switch on the floor.
If you're weighing this up for your own house, the questions that decide it are the physical ones: attic access, basement ceiling, exterior material, and where the equipment can live. We'll walk those before quoting. The related service pages are network installation in Oakville, UniFi installation, security camera installation, and Wi-Fi optimization in Oakville — or see everything we cover across the Oakville service area.
Want your house wired properly, without wrecking it?
SetupTeam retrofits structured network cabling, cameras, and wired access points into finished homes across the GTA — outdoor-rated where it belongs, FT4 in the walls, and nothing visible when we leave.

