

Ubiquiti UniFi installation in Toronto: Network, Protect & Access
UniFi Network, Protect, and Access designed, wired, and configured by one team. A $300 on-site consultation gets you a recommended equipment list and a supply-and-install estimate, sized to what your home needs to run reliably, not to the newest gear.
What does a full UniFi installation include?
A full UniFi installation covers Network, Protect, and Access as one job: one cable run plan and one configuration session, including the Cat6 backhaul every access point and camera depends on. That is part of our wider network cabling and structured wiring service. Ubiquiti has since added UniFi's new Enterprise Audio/Video line to that stack for sending video over the same network. We plan, wire and configure all of it ourselves, so one team answers for how the whole system works.
Wired foundation
Gateway, PoE switching, structured Cat6 cabling, and access point placement for whole-property coverage, without dead zones or mesh compromises.
- Cloud Gateway Max, Cloud Gateway Fiber or UDM SE setup
- UniFi Switch (PoE) installation
- Cat6 drops to all AP locations
- U6 / U7 series access point mounting
- VLAN, guest network, IoT segmentation
- Rack build and cable management
Local surveillance
Camera installation with PoE-powered wired runs, local NVR storage, and app-based remote access. Core functionality needs no cloud subscription.
- G4 / G5 / G6 series camera install
- UNVR for local storage
- PoE Cat6 drops to each camera
- Outdoor mounting: eave, soffit, wall
- UniFi Protect app configuration
- Motion zones and alert setup
Door & entry control
Door readers, hubs, and intercoms that integrate with your UniFi network and Protect cameras, so you run everything from the same console.
- Access Hub installation and wiring
- UA reader / Door Access Mini mounting
- NFC, PIN, and mobile app unlock
- Intercom installation and integration
- Protect camera tie-in for visual verification
- Front door, garage, and gate configurations
Why do Toronto homeowners choose UniFi?
Homeowners choose UniFi because they can see and manage their own network instead of trusting a sealed box. It is Ubiquiti’s business-class platform, sized down for homes at a fraction of what true enterprise gear costs.
You can see every device on the network and decide how its traffic moves. Every deployment centers on one controller, usually a Cloud Gateway Max or Cloud Gateway Fiber, or a UDM SE when a few Protect cameras are part of the job, acting as gateway, router, and management hub combined. All access points, switches, cameras, and door readers report into that single device, and you manage everything from one dashboard that also mirrors to the app on your phone. There is no cloud dependency, and you don’t need a subscription to access your own system.
If you mainly need better wireless coverage rather than a full UniFi build, our Wi-Fi installation and optimization service may be the right starting point.

01 · No subscriptions
UniFi Protect stores footage locally on an NVR or console, with no monthly cloud fee for core surveillance. Ring and Nest gate recordings behind a subscription; UniFi does not.
02 · Single dashboard
Network traffic, camera feeds, and door access events all run through UniFi OS: one console, one app. You are not switching between three platforms to see what is happening on your property.
03 · Wired backhaul
Access points connect to the PoE switch over Cat6, not wirelessly to each other. That gives you consistent, low-latency coverage without the throughput drop mesh relay introduces.
04 · Expandable
Add cameras, access points, or door readers as your property or needs change. UniFi hardware is modular, so you can expand it later without replacing the whole system. Rooms the wiring can't reach can be covered with professionally installed UniFi mesh Wi-Fi.
Planning a new UniFi system? Start with a $300 on-site consultation, so you know what to buy before you spend on gear.
Book a ConsultationHow does a UniFi installation work in Toronto?
Nothing gets cabled until the plan is agreed. We walk the layout, confirm placement for every access point, camera, and door reader, and send you a recommended equipment list with an estimate before we pull a single cable.
On-site consultation
We walk the property, look at the floor plan, and ask how you use each space. You get a recommended equipment list and a supply-and-install estimate. Coverage comes from the layout, not a spec sheet.
Structured cabling
Cat6 runs to every AP, camera, and door reader location, with a second run to any access point that will be hard to reach later. We route, terminate, and label every cable. The wired backhaul is what separates a UniFi system from a mesh workaround.
Hardware install
We mount and connect the gateway, PoE switches, access points, cameras, and door hardware, then physically secure and power-confirm each device before configuration begins.
Controller config
We configure VLANs, guest networks, and IoT segmentation in UniFi OS, and set up Protect zones and Access door rules in the same session: one controller, one configuration pass.
Test & handoff
We test every device live. You receive a walkthrough of UniFi OS, the Protect app, and the Access app before we leave. The system is yours, fully configured and labelled.
This is what the handoff looks like on a finished job: every access point, switch and camera adopted, named by room, online and rated Excellent in the UniFi app. It is the same view you keep on your phone after we leave.
- Every device tested live before we leave
- A walkthrough of UniFi OS, the Protect app and the Access app
- Devices named by room, so an alert tells you where to look
- The system is yours, fully configured and labelled

How does UniFi Protect camera installation work?

UniFi Protect is a surveillance application that runs on the UniFi OS console, the same device that manages your network. Cameras connect over PoE Cat6, and footage stores locally on the console or a connected UNVR.
The app gives you remote access from anywhere without a recurring fee for core functionality. Because Protect lives inside the same ecosystem as your network and access control, a door event can surface a camera view. You can cross-reference a network alert with footage. Everything lives in the same dashboard instead of scattering across disconnected apps. If you’re weighing a traditional (non-UniFi) camera system instead, see our security camera installation page.
What does a UniFi Protect PTZ camera capture?
This is a real UniFi G6 PTZ clip from a SetupTeam install: a pan-tilt-zoom camera tracking a person across an elevated backyard deck and the grounds below. One PTZ camera covers a wide outdoor area from a single mounting point and can follow movement instead of holding one fixed frame.

That is why mounting height and sightlines matter so much on a UniFi Protect camera installation. Footage like this records locally to your UniFi OS console or UNVR, and you review it in the UniFi Protect app. PTZ coverage works best paired with fixed cameras on the entry points that always matter. It adds reach over open ground; it does not replace them.
What does a UniFi Protect system look like in daily use?
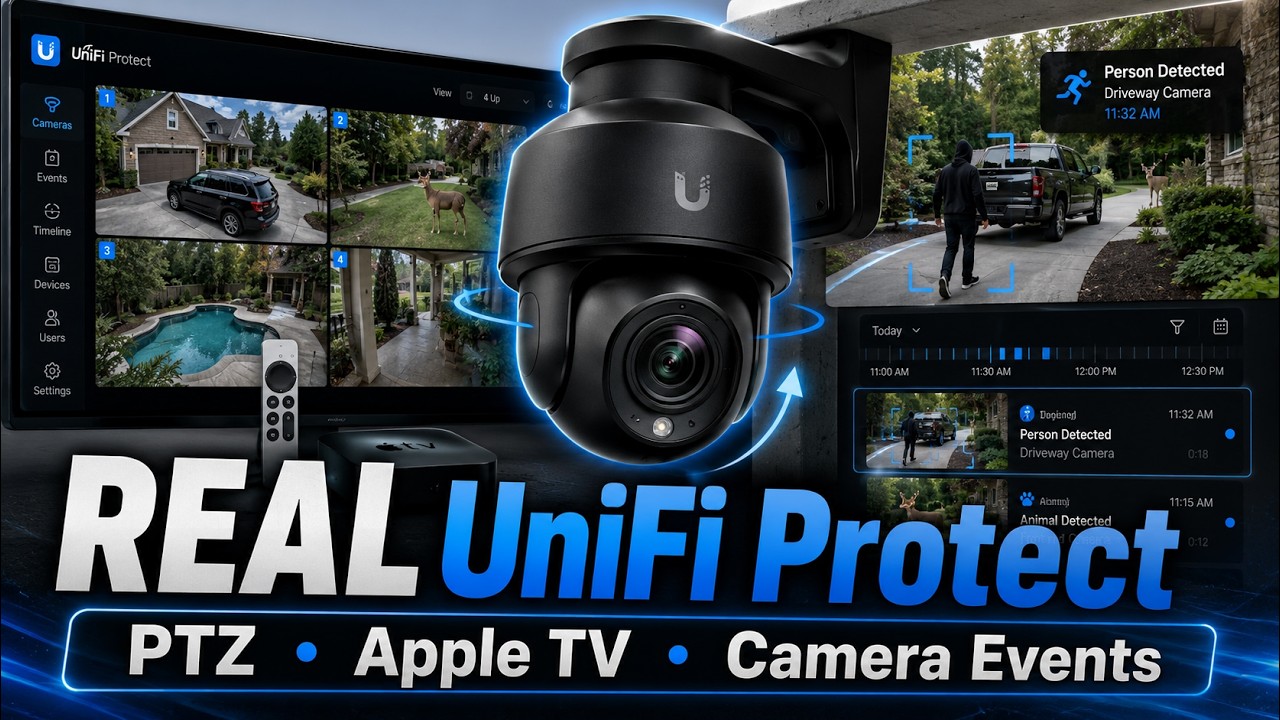
Watch a real SetupTeam UniFi Protect walkthrough showing Apple TV viewing, PTZ camera movement, event review, driveway footage, and practical camera-system use after installation.
What does UniFi Access installation involve?
UniFi Access is the door-control application in the UniFi OS family. It manages entry points such as front doors, garages, secondary structures, and gates, using the same console that runs your network and cameras. Doors, cameras and network share one console and one login.
We install Access Hubs, door readers (NFC, PIN, and mobile app unlock), and intercoms. Each reader integrates with UniFi Protect so you can visually confirm who is at the door before granting access, right in the app.
- Front door NFC and mobile unlock
- Garage and side-entry reader mounting
- Secondary structure access (coach houses, studios)
- Gate entry with intercom integration
- Protect camera tie-in for visual verification
- Multi-user access scheduling and permissions

How does your home’s construction change a UniFi installation?

Homes in the area vary widely in construction type, layout, and cable routing complexity, so coverage planning and cable routing start from the actual floor plan, not a standard-configuration template. A UniFi deployment in a Forest Hill detached home is a different job than one in a Yorkville condo or a Leaside semi with plaster walls.
For homeowners building a broader smart-home ecosystem, our Control4 home automation work integrates with UniFi infrastructure at the network layer.
Detached homes
Multi-floor coverage typically requires two to four access points with wired Cat6 backhaul. Rack and NVR placement is most often the basement mechanical room. Outdoor cameras mount at eaves and soffits.
Century homes
Plaster walls and older construction require careful routing. We plan concealed cable paths and use existing chases where available, to keep the install clean in character properties.
Condos
Suite walls and riser access constrain cable routing. Most condo deployments use one to two access points with surface-mount or ceiling-mount configurations. We work within the building’s restrictions.
Outdoor coverage
Patios, backyards, and driveways require weather-rated outdoor APs and PoE camera drops. We plan outdoor coverage as part of the same initial cable run, not as an afterthought.
Should a new UniFi build use Wi-Fi 7, or stay on Wi-Fi 6?
It depends on your devices and how you use each room. We pick access points from real-world use: where the phones, laptops and TVs sit, who works from home, and which rooms carry the heaviest traffic. For most new builds that points to the U7 generation, but not in every slot.
U7 Pro is our standard access point, with U7 Pro Max only where a zone needs eight spatial streams and 6 GHz capacity. A U7 Pro costs little more than a U6 Pro, and we step up to the U7 Pro Max only where a room will use it.
Apple added Wi-Fi 7 with the iPhone 16 line; the iPhone 15 Pro and the M4 MacBook and iPad range use Wi-Fi 6E. Most premium laptops sold from late 2024 onward include Wi-Fi 7 too.
U6 Pro still earns its place: a basement gym access point serving a few machines, or a hallway carrying mostly phone traffic. We mix generations where it saves money without costing reliability, rather than defaulting to the newest part.
The wired backhaul does not change either way. Cat6 to each access point is the same plan on both generations, so moving from U6 Pro to U7 Pro later is a hardware swap on cable that is already in the wall.
Does a home network need 10 Gbps, or is 2.5 Gbps enough?
For most homes, 2.5 Gbps is enough. We build home networks around 2.5 Gbps switches and gateways because, in our experience, 10 Gbps equipment costs more without changing how a household uses the network day to day. Streaming, video calls and working from home feel the same either way, so the extra spend buys you very little.
There is one real exception: people who move very large files as part of their work. Content creators and other high-demand professionals who copy big projects between machines every day can notice the difference, and for them 10 Gbps can make sense. If that sounds like you, tell us at the consultation and we’ll plan for it.
The wiring doesn’t change either way. Every new cable run we pull is high-quality Cat6, which carries 10 Gbps on runs up to about 180 feet, or as little as about 120 feet where cables are tightly bundled. In our experience, that covers the typical runs in homes up to roughly 10,000 square feet.
On most smaller projects that means a Cloud Gateway Max or Cloud Gateway Fiber with a USW Pro Max 16 PoE, or a Flex 2.5G PoE switch on its 210 W power supply. When a few Protect cameras are part of the job, a UDM SE can take the gateway role and record them too. Larger homes get a bigger switch, and every job is sized to the household rather than to a standard parts list.
So a 2.5 Gbps network today doesn’t lock you in. If your needs change later, moving to 10 Gbps means swapping the switch and gateway, not opening walls to rewire the house. Building from scratch? The same Cat6 plan applies when pre-wiring a new build.
Can a UniFi network keep working when the internet drops?
Yes, with a backup connection. UniFi Network 11 adds WiFi Uplink, which lets a supported gateway join a phone hotspot or another Wi-Fi network when your main internet fails. Email, web apps and card payments keep running over cellular data until the main line returns.
Ubiquiti lists four gateways for the feature: the Dream Router 7, Dream Router 5G Max, Express 7 and Cloud Gateway Industrial. The Cloud Gateway Max, Cloud Gateway Fiber and UDM SE that we install most often are not on that list, so those networks get a dedicated UniFi 5G or LTE backup device, or a second internet line, instead.
A phone hotspot suits a home office that can live with slower internet for a few hours. A shop or office that loses sales offline needs a dedicated backup, and we plan that at the consultation. Network 11 is still an Early Access release, so we back up your configuration and review the firewall before any update. Our UniFi Network 11 backup internet notes cover the limits of a hotspot and what the update changes.
Can you install ceiling access points in a finished house?
Usually only on the top floor. Many people who contact us have already bought UniFi ceiling access points for a house that was never pre-wired. Running cable to main-floor and basement ceilings in a finished house is rarely possible without opening ceilings and walls, so we plan around it instead.
Where we can reach the attic, we run cable down to ceiling access points on the top floor, the way they were designed to be used. For the main floor, the basement and the sides of the house, we use wall access points that mount on a standard single-gang box instead of ceiling units: usually the U7 In-Wall, sometimes the U7 Pro Wall.
Which one depends on the project. The U7 In-Wall is dual-band Wi-Fi 7 with a built-in 2.5 GbE switch, so the same plate can also give a TV or games console a wired connection. The U7 Pro Wall adds the 6 GHz band for rooms full of newer phones and laptops.
We feed those from outside, with dedicated outdoor-rated Cat6 run neatly along the exterior and brought straight through the wall behind each access point. In our experience they perform at least as well as ceiling units in those rooms, and no drywall has to come down.
If you haven’t bought the equipment yet, this is one of the things the on-site consultation settles before you spend money. For more on the routing options, see our guide to running Ethernet in a finished house.


How much does a UniFi installation cost in Toronto?
For most homes and offices, a UniFi project starts with a $300 on-site consultation: we walk the property, learn how you use the network, then send a recommended equipment list and a supply-and-install estimate. Condo installs typically run $1,500 to $3,500 and detached homes $4,500 to $9,500. We size for reliability and daily use, not the newest hardware. Prices are before HST.
$300 + HST
A walkthrough of your layout and how you use it, then a recommended equipment list and a supply-and-install estimate. When you hire us for the install, the fee is credited in full if labour is over $1,000, and half if it is $1,000 or less.
$1,500 – $3,500
A UDR7 or Cloud Gateway Max with one U7 Pro access point, the carrier router moved to bridge mode, and VLAN configuration. Little or no new cable.
$4,500 – $9,500
A Cloud Gateway Max or Cloud Gateway Fiber (a UDM SE when a few cameras are included), a USW Pro Max 16 PoE or Flex 2.5G PoE switch, and three to four U7 Pro access points on fresh Cat6 runs. The most common residential scope.
Estates, multi-building properties and commercial sites are quoted after the on-site consultation. Driveway runs, outbuildings and camera counts differ too much from one property to the next for a fair range. For scale, our largest residential UniFi project so far, UniFi Network and Protect together with the house rewired, six cameras, four access points and a network rack, came to about $15,000 all in. We plan for efficiency and value, not the biggest possible build.
If you plan to buy your own UniFi equipment, a consultation can often save you hundreds of dollars, sometimes more. You avoid gear you don’t need, and access points go where the floor plan says, not where a guess puts them. Whoever supplies the equipment, the $300 is credited when you hire us for the install: in full when our labour is over $1,000, half when it is $1,000 or less. More on why the consultation is paid and what it includes.
Already running UniFi and something isn’t right? A UniFi diagnostic visit of an existing system starts from $400 + HST for the first hour, then $100 + HST for each additional 30 minutes. If we can log in to your console, remote support at $150/hour + HST is often the faster fix. Want a rough number for a new system? Free estimates are by phone at (647) 464-0606.
Need better Wi-Fi without new cable? UniFi Whole Home WiFi 7 (UniFi Express 7) is installed from $1,200 for a 2-pack and $1,500 for a 3-pack. See our mesh Wi-Fi installation options.
What did our largest UniFi Network and Protect project cost?
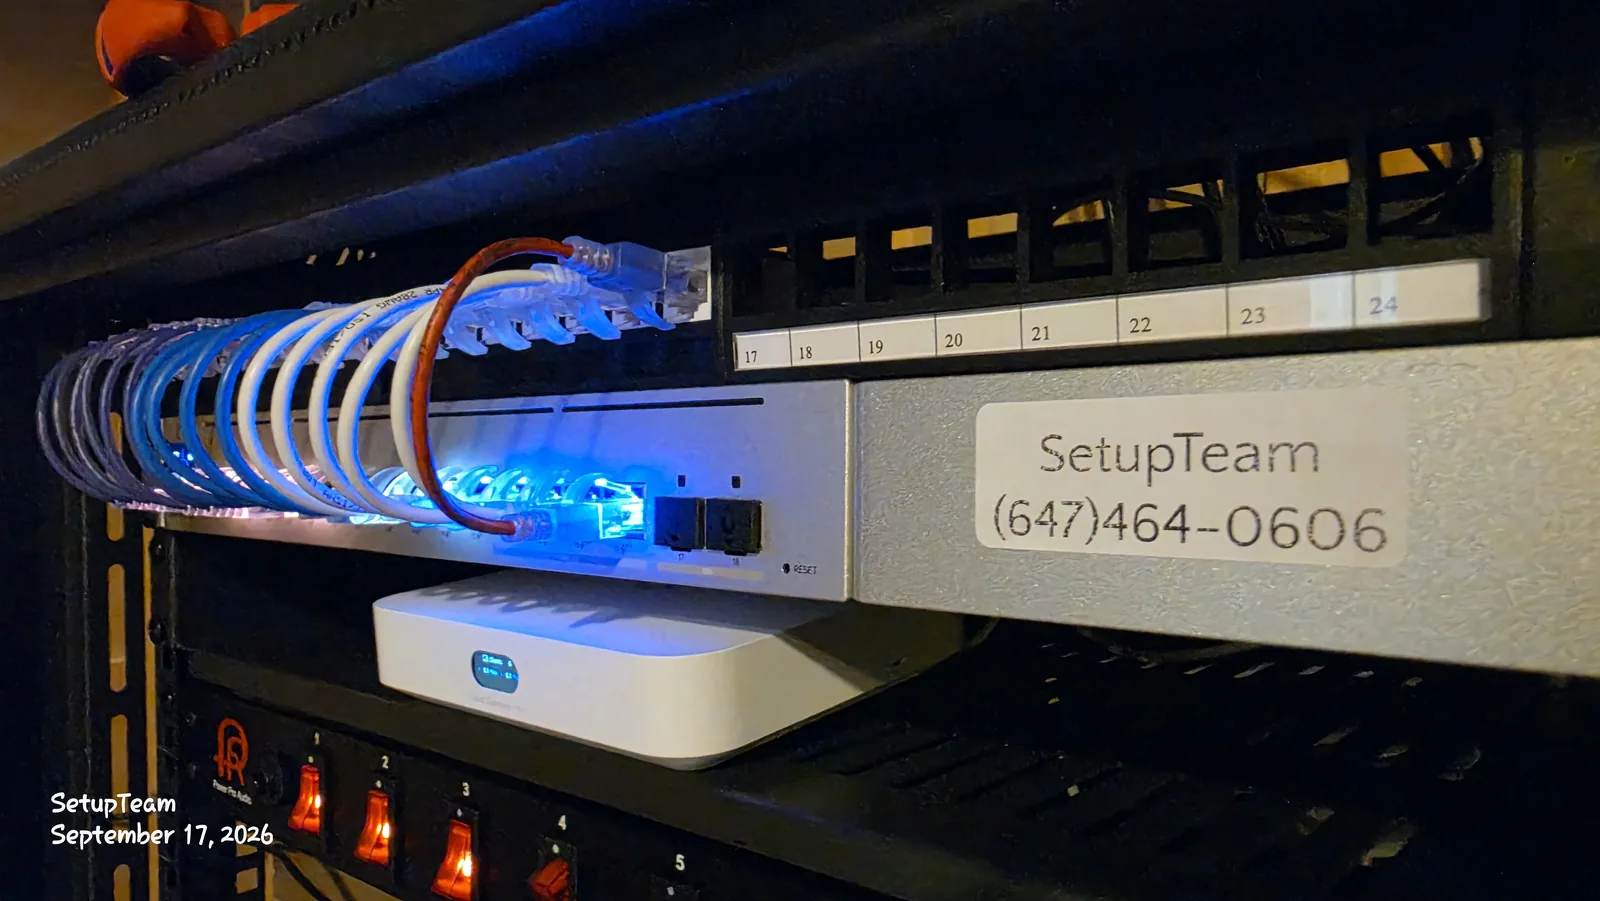
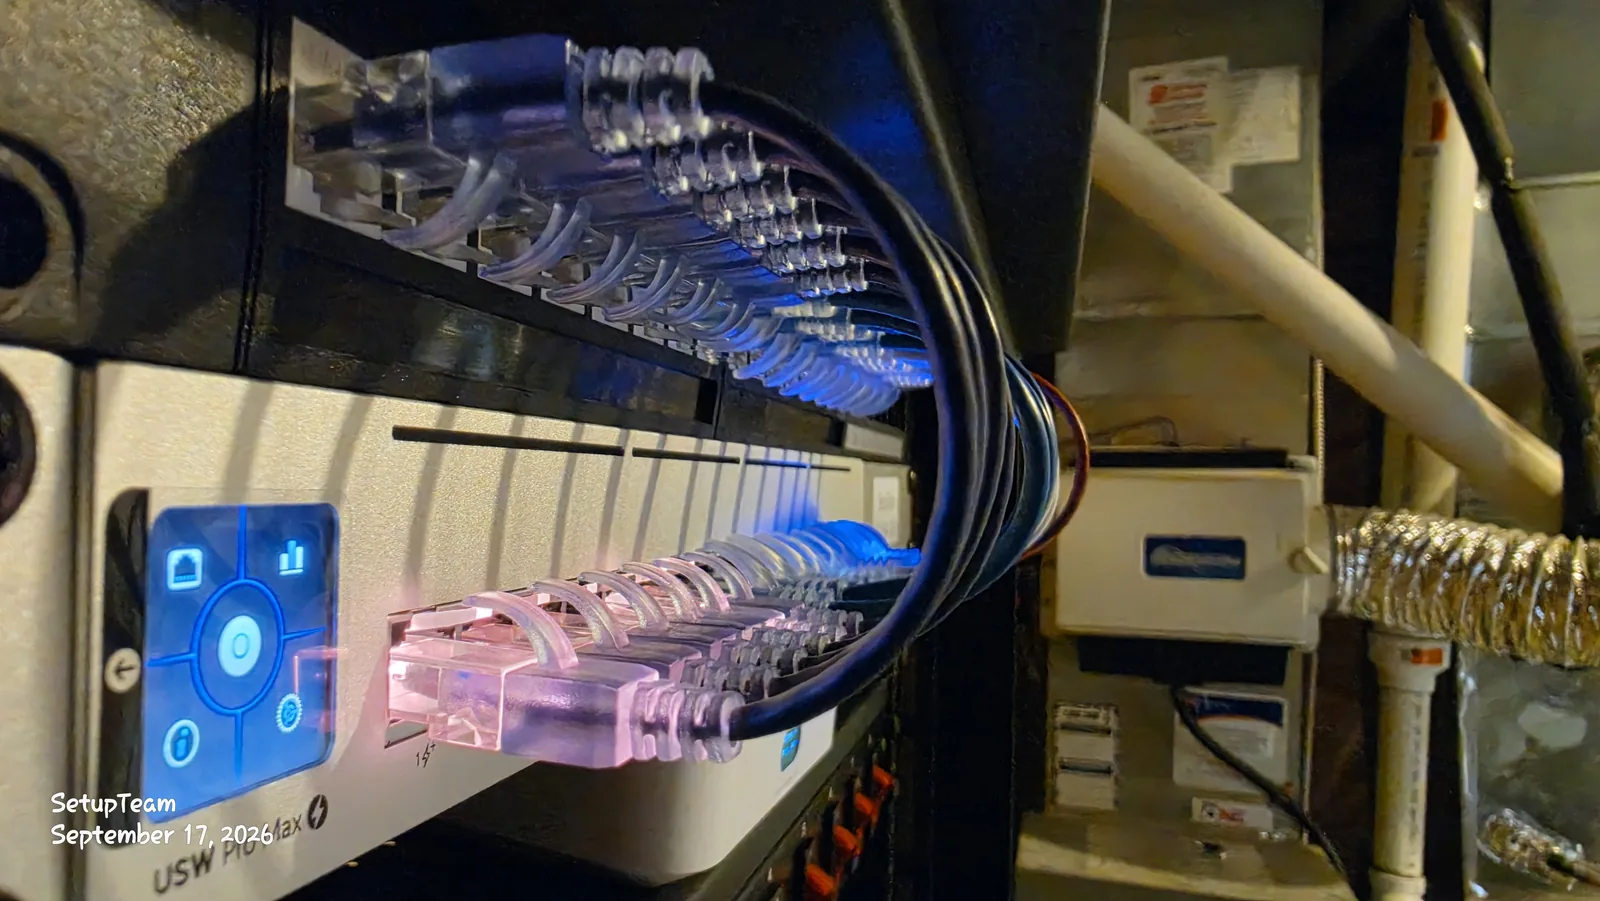
About $15,000 before HST, all in, for our largest residential UniFi project to date: a Thornhill home rewired with Cat6, four access points, a UniFi Cloud Gateway as the controller, a network rack, and six UniFi Protect cameras including PTZ and G6 Turret models. Most homes need far less.
Each device was chosen at the on-site consultation for how the household uses the property, not to fill a spec sheet. The rack was completed in September 2026, labelled port by port.
Common questions about UniFi installation.
UniFi Installation Near You in the GTA
SetupTeam serves communities across the Greater Toronto Area.
Plan your UniFi installation.
Planning a new system? A $300 on-site consultation gets you a recommended equipment list and a supply-and-install estimate before any work begins. Already running UniFi and something isn’t right? Start with remote UniFi support at $150/hour + HST or book an on-site diagnostic on our UniFi troubleshooting page. Want a rough number for a new system first? Call for a free estimate by phone.
Bonded & insured · WSIB · $2M liability · 10,000+ completed projects

